This last week I dove back into the novel I worked on during National Novel Writing Month. While I had a successful NaNoWriMo in 2017, I also took a helter-skelter approach to putting words on the page. I jumped around in my outline when I ran out of steam. I allowed new, unplanned characters to appear and take my attention. I discovered solutions to plot problems and simply picked up the threads as if I had already written the scenes—or I wrote a divergent scene that covered those solutions, while still leaving the first scene in place (essentially writing an alternative universe, if you’re playing along from a sci-fi angle). All of that is great for writing 50,000 words, but not as good for writing a cohesive novel.

After a comfortable break—and wrapping another project—I’m ready to tackle this mess, and thought it was a good time to talk about how I start a revision.

Make a Schedule

The first task is to assess how much I have to read, and then make a schedule. While I’d like to finish the assessment pass in two weeks, I have a lot to read and some other obligations this month, so I’ve stretched my schedule to finish by the end of February.

I considered dividing the number of scenes or number of words by the number of days, but that can lead to some awkward splits and I’d rather make sure I’m comparing multiple options for the same scene on the same day. Any scenes not divided into chapters (which is most of them), I grouped by related content and then divided those into reasonable chunks. I also took my work and social calendar into account, so I wasn’t scheduling too much on a day when I was otherwise busy. At the end of this process I had a calendar and knew exactly what I should be working on each day.

Read the Draft

Once I’m ready to start reading, I gather my materials:

  • My manuscript (on the computer, currently)
  • A notebook
  • A pen
  • Highlighters

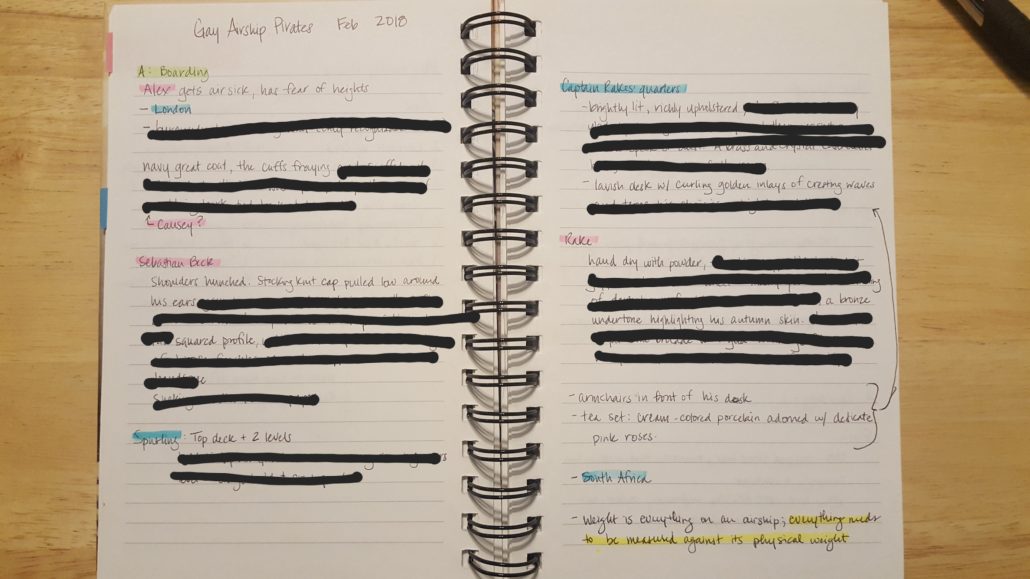
I set up my notebook with the working title of the manuscript, date, and the title of the first scene. Each new section of my notes starts with the title of the scene. Right now the scene titles are a letter for the first name of the POV character and a few words describing what happens. My first scene is “A: Boarding” because it’s when Alex boards the pirate ship.

This assessment pass is strictly to review ideas, figure out what’s missing from the plot, and choose which of those divergent paths I like best, so a lot of my notes are questions. Sometimes those questions are about when information is revealed (and I may find the answer in a later scene). Sometimes those questions are about research or world building that I need to develop. Generally most of my notes center around the plot and character relationships. I also jot down the existing character, setting, and world details, so I can start refining those aspects to later create consistency.

Within each section I take notes roughly in chronological order. I try to group character and setting details together, which may mean that I leave a few blank lines after a character introduction or when we enter a new setting, just in case I wrote some other pertinent details later in the scene.

At the end of each scene I write a one or two sentence summary. This summary should include the most important thing about the scene (from a plot and/or character standpoint) and will later act as a guide to help me figure out if the scene is important enough to make it to the next draft and if it’s in the correct place.

As a final step, I highlight headings so I can reference information later—characters are pink, world building and setting is blue, and plot is yellow. I use green to mark scenes I want to keep or elements in scrapped scenes I want to include in the next draft.

Assess the Draft

After I’ve finished the entire manuscript, I review my notes on what I’ve already written to figure out what adjustments need to be made to my outline, what scenes still need to be written, and what scenes belong in the trash file (I never delete my work while I’m drafting—I never know when I might want to return to an idea or description). By the time I’ve done that review of my notes, I should be ready to start writing again! We’ll find out at the end of February.

Even though I’m an editor for hire, I firmly believe in self-editing. Each month I’m going to drop a tip for developing your ability to edit your own work or identify things to look for as you edit. Make sure to check out all the DIY Edit Tips to improve your self-editing.


06 Description: Camera Pan

Details make a story, but so often I read over a description and my attention is darting all around a room, or all over a character, and I can’t make sense of how the whole thing fits together. It’s the writer’s job to guide the camera and to show the reader the details in an order that will allow them to imagine what’s being described and assemble the whole picture.

When a character first walks into a new setting that you plan to describe in detail, organize the description to follow a camera pan of the room. This can be a vertical pan (up and down) or a lateral pan (left and right). This helps the reader orient the character within the space and gives a clear idea of how the eye is drawn (i.e., what is most important or impressive about the setting).

For example, when a character enters a foyer in a mansion, the description might start with the flooring, go up to the stairs, wrap around to the chandelier, describe the chandelier with more detail, and then come back to the first floor foyer. A logical flow up, up, and back to the character.

If the character is very tired and coming back to their bedroom, the description of the room might start with their bed and then include what they passed on their way from the door to a faceplant, or what they can see through the slits of their eyes across from the bed. Regardless, it’s important to ground the reader so that later when ninjas break through the window, the reader knows if the window is next to the bed or across from it.

Even a character who is out of their mind with anxiety, drugged, or otherwise impaired will look around a room in a way that emphasizes the important information. They may not be able to perfectly orient themselves, but they’ll be able to hit on the most important details and then flesh out those details once they’re feeling calmer.

This works the same for describing a person’s appearance. Either describe from the feet up (if the first thing the character would observe is the person’s shoes or feet), or describe from the head down (if the first thing the character observes is the person’s hair or face). Some details can emerge later—a mole the character didn’t notice earlier, nervous tics, or maybe as the couple falls in love his features become more attractive—but that first description should follow a logical flow.

Keeping the description organized helps the reader visualize and remember it.  Organizing the details emphasizes your careful work, and lets the reader focus on those details rather than struggle to follow a darting eye.


Like what you read? Help me continue making this content by leaving a tip through Ko-fi.

Receiving constructive criticism can be as difficult as giving it. It can be challenging to divorce personal feelings—and all the hard work put into the previous draft—from someone else’s opinion. But when I put my story out there to receive constructive criticism, I need to be open to it. I have to put aside my feelings and understand that these comments aren’t about my quality as a writer; they’re about the execution in this one specific piece of writing. Even if I think it’s my very best work, it’s only my very best work so far. Think of all the ways it can be improved! So, starting with a deep breath, constructive criticism can be the best thing for my work, especially if I’m open to change. I have a three step-method for taking in constructive criticism that includes listening to what is said, evaluating how that critique fits with my plan for the story, and then getting excited to revise!

Listen

When I get feedback from a critique, I start by reading each comment as though I’m another evaluator on the manuscript. I’m not the author when I first read a critique. I’m another objective party, taking in someone else’s comments to get the big picture of the feedback. I start by reading the summary comments and then all of the in-line comments before making any decisions about how to act on those comments.

Evaluate

Now that I’ve listened objectively, I get to be the author again! It’s important to keep some objectivity, after all the purpose of constructive criticism is to identify ways to strengthen the writing. Now, though, I start deciding how to address each comment. Should I keep the exact suggestion a reviewer made? Should I accept that something’s hinky but enact my own solution? Should I ignore the comment? Ignoring a comment is a perfectly legitimate way to respond to a critique. Someone might not “get” what I’m doing, and it’s okay for me, the author, to decide that I know what’s best for my work.

One method I use for evaluating comments is to have the comments and my story side by side in separate documents. If I disagree with a comment outright, I don’t move it to my story document. If it’s an easy fix (a grammatical error or improving word choice), I immediately do it. If it’s a trickier one or one that I’m not sure I want to make, I summarize the feedback as in-line comments on my story document and add my thoughts. At the end of the evaluation, I have all the comments I will or possibly want to respond to on my story document.

Get Excited

After every critique I walk away feeling excited to work on my story. I’ve thought about the feedback and, through evaluation, have come up with at least a few solutions to strengthen some of the weaknesses of the manuscript. Yes, I might have a lot of work ahead. Yes, someone might not have seen all of my brilliance. But I now have ideas for making the story better, and that’s a pretty exciting thing.